This article will walk you through creating and configuring a simple contact form for the best results possible. You will also learn how to insert it into a page you build and configure both the confirmations and notifications.
Create the Form
Before we put the form on your website, we have to create it first. To create the form, log into your website admin dashboard (I.E., https://inside.ewu.edu/yourwebsite/wp-admin) and follow the steps below.
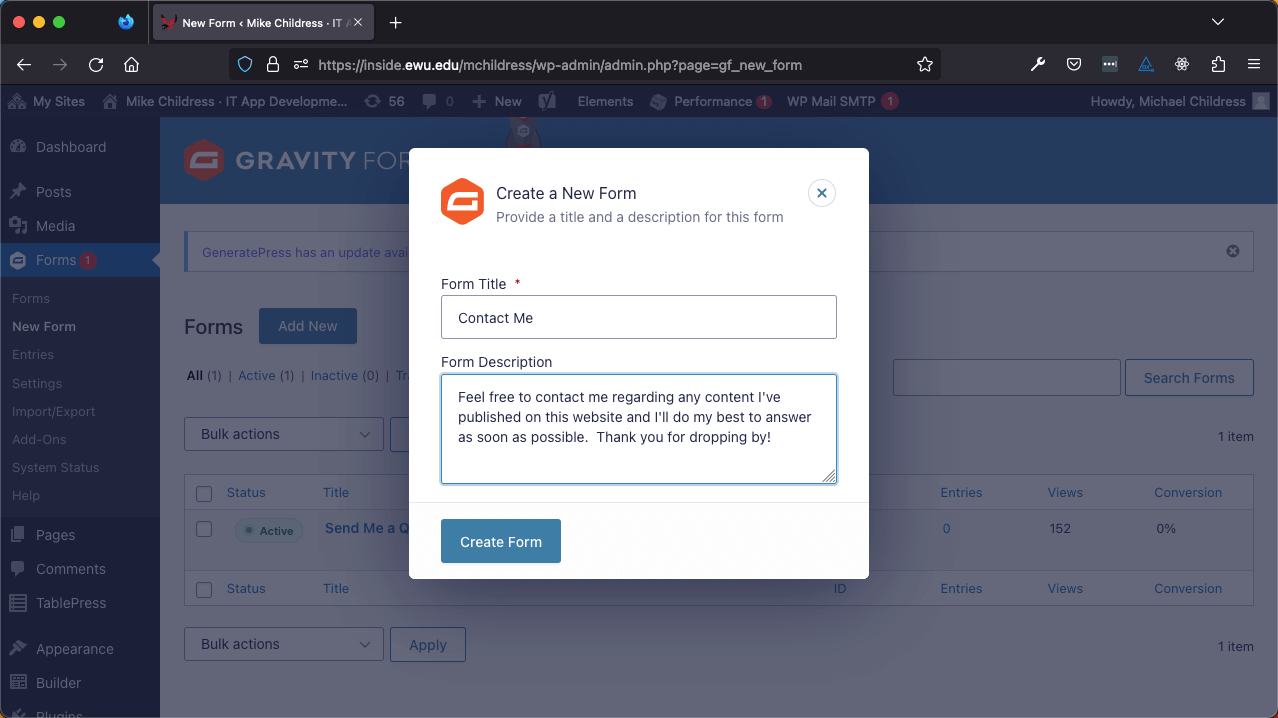
- From your WordPress dashboard go to Forms > New Form.
- Give your new form a title and an appropriate description, and click the blue Create button. Remember the form title and description you enter may display on your website’s front end.
Add Name Field
When you add the name field, it should default to the first and last name, which is usually sufficient for a simple contact form. Explore the options provided if you require a different format for the name field.
- From the form canvas, click the Add Fields tab and then the Advanced Fields accordion menu. When the menu opens, click the Name field to add it to the form canvas.
- Click the Settings button above the Name fields and make it a required field by selecting the checkbox rule Required.
Add an Email Field
- Click the Add Fields tab from the form builder canvas and then the Advanced Fields accordion menu. When the menu opens, click the Email button to add it to the form canvas.
- Click the Settings button above the Email field and make it a required field by selecting the checkbox rule Required.
Add a Comment Field
Add a large paragraph text box for a comment area to allow visitors to share their comments unhindered by text box size.
- Click the Add Fields tab from the form builder canvas and then the Standard Fields accordion menu. When the menu opens, click the Paragraph Text button to add it to the form canvas.
- Click the Field Settings tab and rename this field to something more descriptive than Untitled.
- Depending on your preference, you may or may not make this field Required.
- Click the blue Save Form button near the browser window’s top right.
Create a Page to Embed Your Form Into
Now that you have the form created, you’ll want to display it on the front end of your website.
- Create a new page that will house the contact form. In this example, we’ll call our new page Contact Us.
- Open the Block inserter, locate the Gravity Forms block, and click it to add it to the content area of your webpage. Select the form you want to embed into the WordPress page from the dropdown menu.
- You have the option of displaying the page title or the form title. Avoid using both to avoid confusing the reader.
Configure Your New Form
Once you create the form, you’ll need to perform some essential tasks to ensure it functions the way you want it to. Nothing says “unprofessional” like a default form confirmation except a default submission notification. You can modify the Admin Notification to meet your simple contact form needs.
- Navigate back to your form in Edit mode.
- Go up to Settings > Confirmations.
- Click the Edit link on the Default Confirmation.
- You have three confirmation types to choose from on the confirmation configuration page.
- Text Confirmation
- Page Confirmation
- Redirect Confirmation
Text Confirmation
Text confirmations are easy to create and a nice touch to any form. By far, the most common confirmation is the text confirmation option. The text confirmation type keeps the visitor on the web page and allows you to customize the message displayed to the visitor who submitted the form. The message can include a thank you note and form data the user submitted.
- In the form editor navigate to Settings > Confirmations.
- Edit the Default Confirmation.
- Under the confirmation type select Text.
- Provide a customized message that you would like users to see on the confirmation.
- Click the blue Save Confirmation button.
Page Confirmation
The page confirmation option is best if you direct users to a separate page on the same website following a form submission. By redirecting users to a different page within the same website, you can thank them for their interest and offer additional information and resources through links, photos, videos, and more.
- Create a new Page and give it a title like “Thanks for Reaching Out!” or something similar.
- Create the content on the new page thanking the visitor for their form submission and providing more information on related content, services, etc.
- Navigate to your form in Edit mode and select Page for the confirmation type.
- From the dropdown menu, select the page you created in the first bullet point.
- Click the blue Save Confirmation button.
Redirect Confirmation
While similar to a page confirmation, a redirect confirmation will allow you to direct visitors to domains outside of where the form resides when the need arises. For the most part, you can follow the instructions outlined under page confirmations. The only difference is that you will enter a URL that can go to another website rather than a thank you or acknowledgment page described in the page confirmation steps. Make sure to save your changes.
In the following video, I demonstrate how to modify the Default Confirmation from a Text Confirmation to a Page Confirmation. You can apply the same type of modification to the Redirect confirmation.
Configuring Form Submission Notifications
Form submission notifications are extremely useful when you want to notify people when a form is submitted. In our simple contact form configuring the notification is pretty simple. More complex notifications can be used when you work with workflow functionality which is available through the web services team in Instructional Technology at EWU.
The Admin (Default) Notification
You can get away with modifying the Admin Notification created by default. In the short video below we:
- Navigate to the Admin Notification.
- Add a Reply To email address so I can answer comments through my email.
- Ensure the {form_title} tag is in the Subject link so you will know where the submission is originating from.
Points to Remember
- Text confirmations are helpful when a form is located near the top of the webpage to ensure the visitor will see the message.
- Page confirmations are best when your form is near the footer of your website.
Conclusion
Simple contact forms are an excellent way for visitors to contact you through your website at EWU. I hope to offer more articles that will dig deeper into what you can do with forms and how they can help you, your team, or your department work effectively in our digital landscape.
How do you use forms? How can your office use them to improve your business processes? Let me know in the contact form below!


